Getting Started
Introduction
The Freight Module in Blockpeer is a comprehensive freight management system designed to streamline your freight bookings, shipping operations, and invoicing processes. It provides end-to-end visibility and control over your freight operations, from initial booking to final invoicing.

What is the Freight Module?
The Freight Module helps you:
- Manage freight bookings - Create and track booking requests
- Handle shipping operations - Process shipping plans and documentation
- Generate invoices - Convert completed shipments to invoices
- Track customers - Maintain customer information and contacts
- Send shipping instructions - Communicate with customers via email
- Manage eBL - Handle electronic Bill of Lading documentation
- Configure pricing - Set up containers, services, and pricing
Accessing the Freight Module
Navigation Steps:
- Log in to your Blockpeer account
- From the left sidebar, you'll see the Freight Module sections:
- Dashboard - Overview and metrics
- Customer - Customer management
- Booking - Booking requests
- Shipping - Shipping operations
- Invoice - Invoice management
- System Setup - Configuration settings
- Team Chat - Internal communication
- Support Ticket - Help and support
- User Guide - Documentation
Understanding the Dashboard
Dashboard Overview
The Freight Dashboard provides a comprehensive view of your freight operations with key metrics and recent activities.
Key Metric Cards
Total Customer
- Display: Shows total number of customers
- Current Count: 0
- Color: Pink background
- Icon: People icon
- Purpose: Track customer base size
Total Booking
- Display: Shows total booking requests
- Current Count: 0
- Color: Green background
- Icon: Booking/calendar icon
- Purpose: Monitor booking volume
Total Shipping
- Display: Shows active shipments
- Current Count: 0
- Color: Orange background
- Icon: Shipping/truck icon
- Purpose: Track shipping operations
Total Invoice
- Display: Shows invoice count
- Current Count: 0
- Color: Cyan background
- Icon: Invoice/document icon
- Purpose: Monitor billing activities
Freight Module Workflow
Complete Freight Process Flow
The Freight Module follows a structured workflow from booking to invoicing:
1. BOOKING STAGE
   ↓
   Create Booking Request
   ↓
   Accept or Reject
   ↓

2. SHIPPING STAGE (if accepted)
   ↓
   Convert to Ship
   ↓
   Fill Shipping Details
   ↓
   Send Shipping Instruction
   ↓
   Customer Fills eBL Form
   ↓
   Mark as Draft
   ↓
   Sign eBL
   ↓
   Accept or Reject
   ↓

3. INVOICE STAGE (if accepted)
   ↓
   Convert to Invoice
   ↓
   Generate Invoice
   ↓
   Send to Customer
Key Features Overview
1. Booking Management
Purpose:
- Create freight booking requests
- Review and approve bookings
- Track booking status
Key Actions:
- Accept: Approve booking and proceed to shipping
- Reject: Decline booking request
- Convert to Ship: Move accepted booking to shipping stage
2. Shipping Operations
Purpose:
- Manage shipping documentation
- Fill in shipment details
- Communicate with customers
- Handle eBL processes
Key Actions:
- Send Shipping Instruction: Email instructions to customer
- Fill Details: Complete main carriage, container, order, services, route information
- eBL Management: Draft and sign electronic Bill of Lading
- Accept/Reject: Approve or decline shipment
- Convert to Invoice: Move to invoicing stage
3. Invoice Generation
Purpose:
- Generate invoices from completed shipments
- Track payment status
- Send invoices to customers
Key Actions:
- View Invoice: Review invoice details
- Add Payment: Record payment received
- Send Invoice: Email to customer
4. System Configuration
Purpose:
- Set up pricing structures
- Configure container types
- Define services offered
Configuration Options:
- Price Management: Set volume, weight, and service prices
- Container Setup: Define container types and specifications
- Service Setup: Configure available services
Getting Started Checklist
Before you start using the Freight Module effectively, complete these setup steps:
✅ Step 1: System Configuration
Navigate to System Setup:
- Click System Setup in sidebar
- Configure the following:
Price Setup:
- Create pricing structures
- Define volume prices
- Set weight prices
- Configure service prices
Container Setup:
- Add container types (20ft, 40ft, etc.)
- Set container specifications
- Define volume pricing
Service Setup:
- Add freight services
- Set cost and sale prices
- Define service categories
✅ Step 2: Add Customers
Navigate to Customer:
- Click Customer in sidebar
- Click + (Plus) button
- Fill customer details:
- Name
- Contact number
- Email address
- Save customer information
✅ Step 3: Create First Booking
Navigate to Booking:
- Click Booking in sidebar
- Click + (Plus) button
- Fill booking request form:
- Select customer (Bill To and Ship To)
- Enter loading port
- Enter discharge port
- Select vessel
- Choose date
- Enter barcode
- Add tracking number
- Attach files if needed
- Submit booking request
✅ Step 4: Process Booking
Accept or Reject:
- Review booking details
- Click Accept to proceed
- Or click Reject to decline
- Accepted bookings get "Convert to Ship" option
✅ Step 5: Manage Shipping
Convert and Process:
- Click Convert to Ship button
- Booking moves to Shipping section
- Fill in shipping details:
- Main Carriage information
- Container details
- Order information
- Services required
- Route details
- Send shipping instructions to customer
- Customer fills eBL form
- Mark eBL as draft
- Sign eBL document
✅ Step 6: Generate Invoice
Create Invoice:
- Complete all shipping details
- Click Convert to Invoice button (appears after all details filled)
- Invoice generated automatically
- View in Invoice section
- Send to customer
- Track payment status
Understanding Status Flow
Booking Status
Draft
- Initial state
- Booking created but not submitted
- Can be edited
Pending
- Awaiting review
- Needs acceptance or rejection
Accepted
- Booking approved
- Ready to convert to shipping
Rejected
- Booking declined
- No further action needed
Shipping Status
Draft
- Initial shipping stage
- Details being filled
In Progress
- Actively being processed
- Shipping instructions sent
Awaiting eBL
- Customer to fill eBL form
eBL Draft
- eBL marked as draft
eBL Signed
- eBL document signed
Accepted
- Shipment approved
- Ready for invoicing
Rejected
- Shipment declined
Invoice Status
Unpaid
- Invoice generated
- Payment pending
Paid
- Payment received
- Invoice closed
Partially Paid
- Some payment received
- Balance remaining
Navigation Quick Reference
Sidebar Menu
Dashboard
- Overview and metrics
- Recent activities
- Quick access to sections
Customer
- Add new customers
- View customer list
- Edit customer details
- Manage contacts
Booking
- Create booking requests
- View all bookings
- Accept/reject bookings
- Convert to shipping
Shipping
- Manage shipments
- Fill shipping details
- Send instructions
- Handle eBL
- Convert to invoice
Invoice
- View all invoices
- Invoice details
- Payment tracking
- Send to customers
System Setup
- Price configuration
- Container setup
- Service management
Team Chat
- Internal communication
- Collaborate with team
Support Ticket
- Get help
- Submit issues
User Guide
- Documentation
- How-to guides
Common Workflows
Workflow 1: Standard Freight Booking
Scenario: Customer requests freight service
Steps:
-
Create Booking
- Go to Booking section
- Add new booking request
- Fill customer and shipment details
- Submit
-
Review and Accept
- Review booking information
- Verify details
- Click Accept
-
Convert to Shipping
- Click "Convert to Ship" button
- Booking moves to Shipping section
-
Process Shipment
- Fill all shipping details
- Send shipping instructions
- Handle eBL documentation
-
Generate Invoice
- Click "Convert to Invoice"
- Invoice created automatically
- Send to customer
-
Track Payment
- Monitor payment status
- Record payments received
- Close invoice when paid
Workflow 2: Shipping Instruction Process
Scenario: Send shipping details to customer
Steps:
-
Complete Shipping Details
- Fill main carriage info
- Add container details
- Enter order information
- Configure services
- Define route
-
Send Instructions
- Click "Send Shipping Instruction" button
- Email sent to customer automatically
- Customer receives shipment details
-
Customer Response
- Customer fills eBL form
- eBL data submitted
-
Company Processing
- Mark eBL as draft
- Review eBL details
- Sign eBL document
- Complete shipment
Workflow 3: eBL Management
Scenario: Handle electronic Bill of Lading
Steps:
-
Shipping Instruction Sent
- Customer receives email
- eBL form link provided
-
Customer Fills Form
- Customer completes eBL
- Submits information
-
Company Review
- Receive eBL data
- Review for accuracy
- Mark as draft if corrections needed
-
Finalization
- Sign eBL document
- Complete documentation
- Proceed to invoicing
Dashboard Sections Explained
Invoice Payment Section
Purpose:
- Track invoice payment status
- Quick payment overview
- Empty state when no invoices
Displays:
- Payment due
- Payment received
- Outstanding balance
Recent Invoice Section
Columns:
- INVOICE: Invoice number
- CUSTOMER: Customer name
- ISSUE DATE: Invoice date
- DUE DATE: Payment due date
- DUE AMOUNT: Amount to be paid
- STATUS: Payment status
Empty State:
- "Opps... No Data Found"
- Create first invoice to see data
Recent Shipping Section
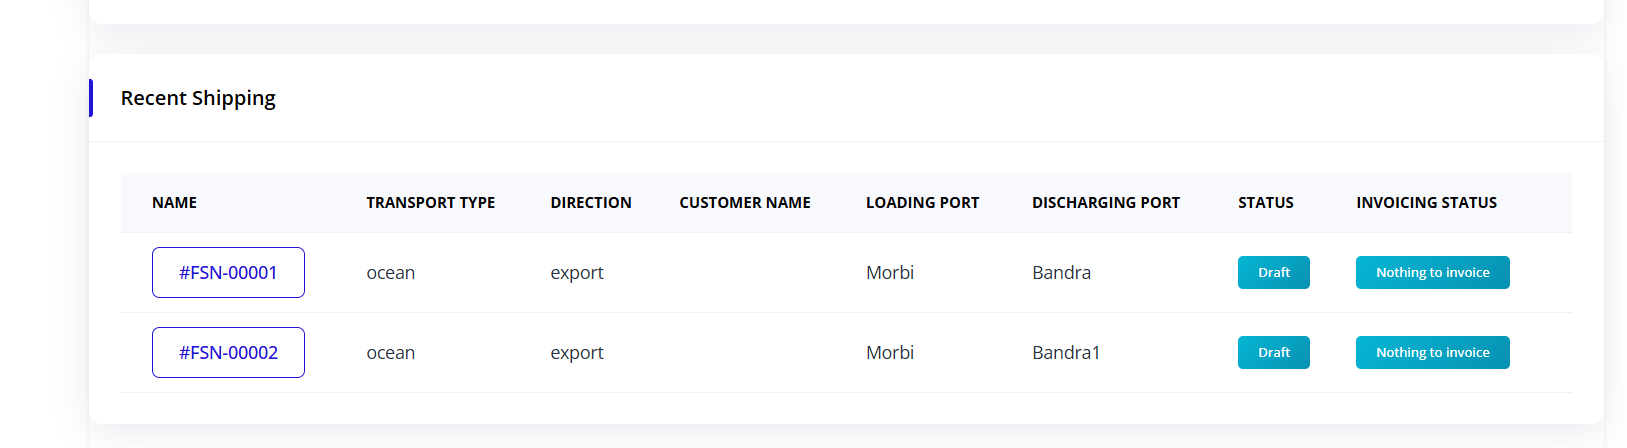
Columns:
- NAME: Shipment identifier
- TRANSPORT TYPE: Mode of transport (ocean, air, land)
- DIRECTION: Export or Import
- CUSTOMER NAME: Client name
- LOADING PORT: Origin port
- DISCHARGING PORT: Destination port
- STATUS: Current shipping status
- INVOICING STATUS: Invoice generation status
Empty State:
- "Opps... No Data Found"
- Create first shipment to see data
Best Practices
Booking Management
Do:
- Review booking details thoroughly before accepting
- Verify customer information is complete
- Check port and vessel availability
- Confirm dates and schedules
- Maintain clear communication with customer
Don't:
- Accept incomplete booking requests
- Skip verification steps
- Ignore special requirements
- Delay acceptance/rejection decisions
Shipping Operations
Do:
- Fill all shipping details completely
- Send shipping instructions promptly
- Follow up on eBL submissions
- Review eBL data carefully before signing
- Keep customers informed of progress
Don't:
- Leave shipping details incomplete
- Skip eBL documentation
- Sign eBL without verification
- Convert to invoice before completion
Invoice Management
Do:
- Generate invoices promptly after shipment completion
- Send invoices to customers immediately
- Track payment status regularly
- Record payments accurately
- Follow up on overdue payments
Don't:
- Delay invoice generation
- Skip invoice verification
- Forget to send to customer
- Neglect payment tracking
Tips for Efficient Use
Organization
-
Consistent Naming
- Use clear booking references
- Standard customer naming
- Organized file attachments
-
Regular Updates
- Update statuses promptly
- Keep shipping details current
- Record payments immediately
-
Communication
- Send instructions early
- Follow up on pending items
- Maintain email records
Time Management
-
Batch Processing
- Review multiple bookings together
- Process similar shipments in batches
- Generate invoices in groups
-
Priority Handling
- Address urgent bookings first
- Track approaching deadlines
- Follow up on overdue items
-
Automation Use
- Use email templates
- Automate shipping instructions
- Set up recurring services
Troubleshooting Common Issues
Cannot Create Booking
Issue: Unable to add new booking
Solutions:
- Ensure customer exists in system
- Verify all required fields are filled
- Check date format is correct
- Confirm ports are valid
- Try refreshing the page
Shipping Instruction Not Sending
Issue: Email not reaching customer
Solutions:
- Verify customer email address
- Check spam/junk folder
- Ensure shipping details are complete
- Confirm email server is working
- Resend instruction
Cannot Convert to Invoice
Issue: Convert button not appearing
Solutions:
- Ensure all shipping details are filled
- Verify eBL is signed
- Check shipment status is correct
- Complete all required tabs
- Contact administrator if persists
eBL Form Issues
Issue: Customer cannot access eBL form
Solutions:
- Verify shipping instruction was sent
- Check email delivery status
- Ensure link is not expired
- Resend shipping instruction
- Provide direct link to customer
Next Steps
Now that you understand the Freight Module basics, explore these topics:
- Customer Management - Learn to add and manage customers
- Booking Management - Master booking creation and processing
- Shipping Operations - Handle shipments and documentation
- Invoice Management - Generate and track invoices
- System Setup - Configure prices, containers, and services
Summary
The Freight Module provides comprehensive freight management:
✅ End-to-end workflow from booking to invoicing
✅ Clear status tracking at each stage
✅ Customer communication via shipping instructions
✅ eBL management for documentation
✅ Accept/reject controls at critical stages
✅ Automated conversions between stages
✅ Flexible configuration for your business needs
Master the Freight Module to streamline your freight operations and improve efficiency.