Getting Started
Initial Setup
Step 1: Access Blockpeer Contract
- Log in to your BlockPeer account
- From the module selection screen, click on Blockpeer Contract
- You'll be taken to the Contract dashboard
Step 2: Understanding the Dashboard
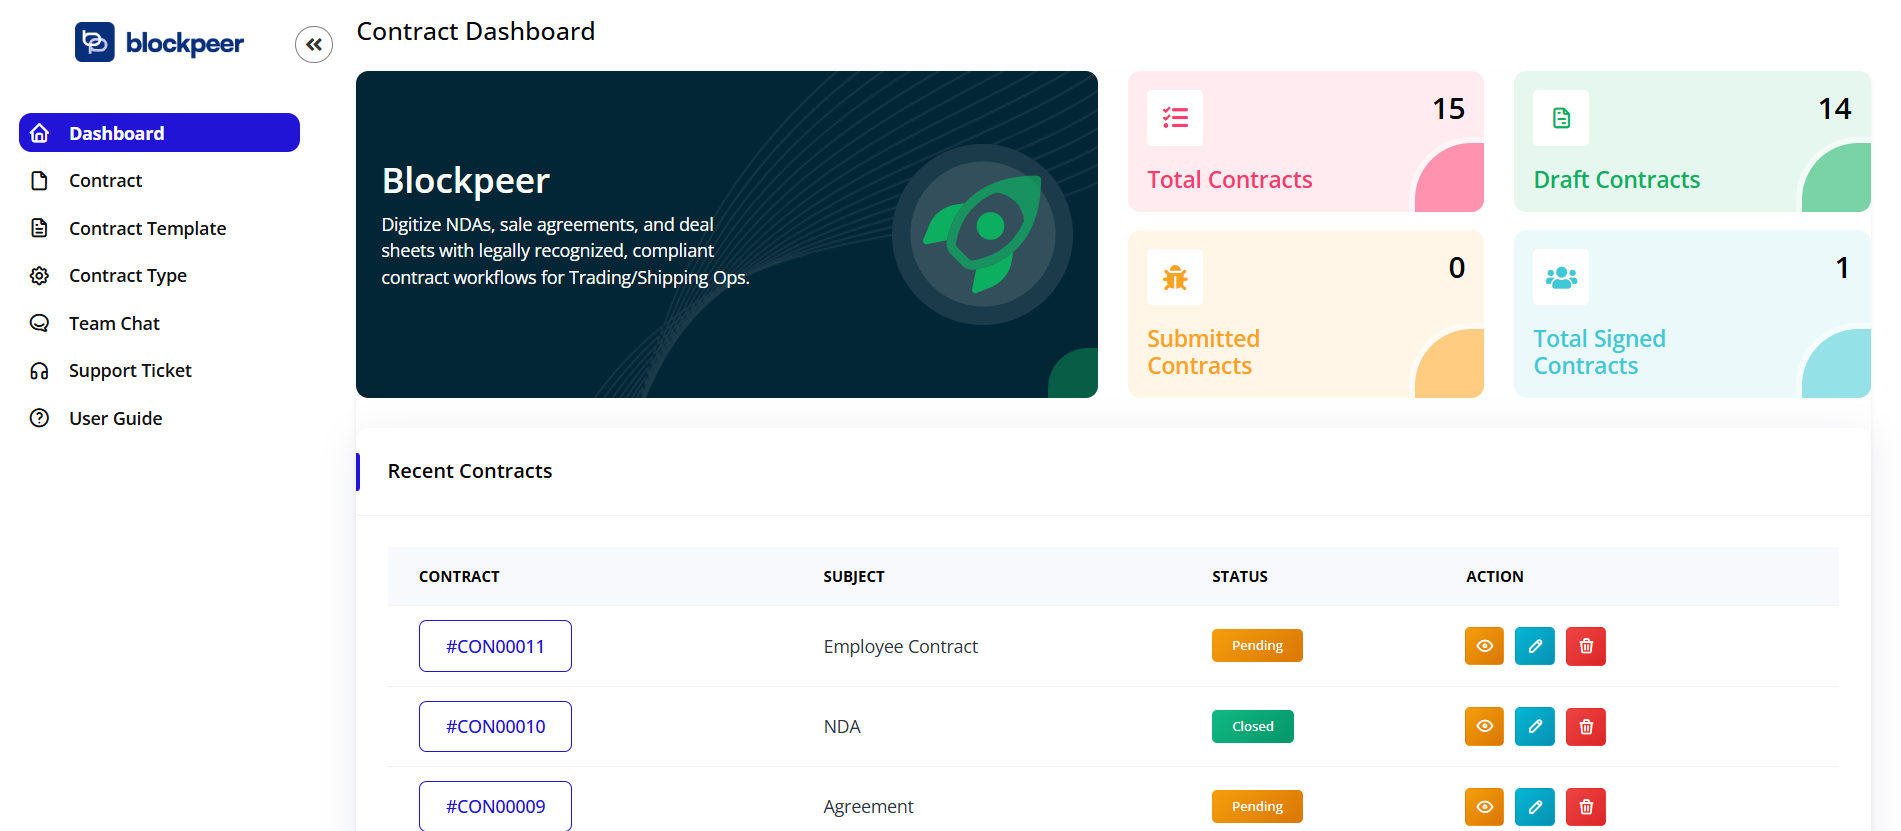
The Contract dashboard provides a comprehensive overview of your contract management activities:
- Total Contracts: View all contracts created in your organization (14)
- Draft Contracts: Track contracts that are still being prepared (13)
- Submitted Contracts: Monitor contracts sent for signatures (0)
- Total Signed Contracts: See completed and signed contracts (1)
Step 3: Initial Configuration
Before creating contracts, set up your preferences:
- Navigate to Contract Type
- Define contract categories:
- Sales Agreement
- Service Contract
- NDA (Non-Disclosure Agreement)
- Employment Contract
- Vendor Agreement
- Click Save Configuration
Step 4: Create Contract Templates
- Go to Contract Template
- Click + New Template
- Design reusable contract templates:
- Add standard clauses
- Define signature fields
- Set default values
- Configure parties information
- Save templates for quick contract creation
Quick Start Guide
For Creating Your First Contract
- Create Contract: Click + New from the dashboard to start a new contract
- Add Content: Use the rich text editor to write or paste your contract content
- Define Signers: Add parties who need to sign the contract
- Add Signature Fields: Drag and drop signature boxes where signatures are needed
- Send for Signature: Click Send to distribute the contract to all signers
For Signing Contracts
- Receive Notification: Get email notification when a contract needs your signature
- Review Contract: Open and read the contract thoroughly
- Sign: Click Sign Yourself and place your signature in designated fields
- Submit: Complete the signing process
Navigation Overview
- Dashboard: Central hub showing contract statistics and recent contracts
- Contract: View and manage all your contracts
- Contract Template: Create and edit reusable contract templates
- Contract Type: Define and organize contract categories
- Team Chat: Communicate with team members about contracts
- Support Ticket: Get help with contract-related issues
- User Guide: Access detailed documentation
Understanding Contract Status
Contracts in the system have different statuses:
- Draft: Contract is being prepared and not yet sent
- Pending: Contract has been sent and awaiting signatures
- Partially Signed: Some parties have signed, waiting for others
- Signed: All parties have completed signing
- Expired: Contract deadline has passed without completion
- Declined: One or more parties declined to sign
Best Practices
- Use contract templates for frequently used agreements to save time
- Organize contracts using proper naming conventions (include date and parties)
- Define clear contract types for easy filtering and searching
- Add all necessary signature fields before sending
- Include contract expiry dates for time-sensitive agreements
- Review contracts thoroughly before sending for signatures
- Download signed copies for your records
- Use Team Chat to discuss contract details with colleagues
Troubleshooting
Q: I can't edit a contract after sending it A: Once sent, contracts are locked to maintain integrity. Create a new version if changes are needed.
Q: How do I add multiple signers? A: In the contract editor, click "Add Signer" under the parties section and enter each signer's details.
Q: Can I use my own contract templates? A: Yes, you can upload existing documents or create new templates using the Contract Template feature.
Q: What file formats are supported for contracts? A: The system supports PDF downloads. You can also copy content from Word, Google Docs, or other text editors.
Q: How do signers receive the contract? A: Signers receive an email notification with a secure link to view and sign the contract.