Configuration
Overview
The Configuration module is the essential first step in setting up your eTrade system. Before you can create any electronic trade documents (eInvoices, ePromissory Notes, Warehouse Receipts), you must complete the configuration process which establishes your blockchain identity and links it to your domain name.
Why Configuration is Required
Configuration establishes:
- Blockchain Identity: Your unique token registry on blockchain
- Domain Verification: Links your business domain to blockchain address
- Trust Framework: Enables TradeTrust verification
- Document Issuance: Allows creation of verifiable trade documents
- Legal Validity: Provides proof of document issuer identity
Without proper configuration, you cannot create or issue trade documents.
Configuration Process Overview
The configuration involves four mandatory steps that must be completed in order:
1. Connect Wallet
   ↓
2. Create Token Registry
   ↓
3. Add DNS TXT Record
   ↓
4. Verify DNS Configuration
   ↓
Ready to Create Documents
Step 1: Connect Wallet
What is Wallet Connection?
Connecting your cryptocurrency wallet establishes your blockchain identity and enables you to:
- Create token registry smart contracts
- Sign blockchain transactions
- Issue digital documents
- Transfer and endorse documents
- Pay blockchain transaction fees (gas)
Accessing Config
- Log in to Blockpeer eTrade
- Click Config in the left sidebar
- You'll see the Transfer Documents Configuration page
Initial Configuration Screen
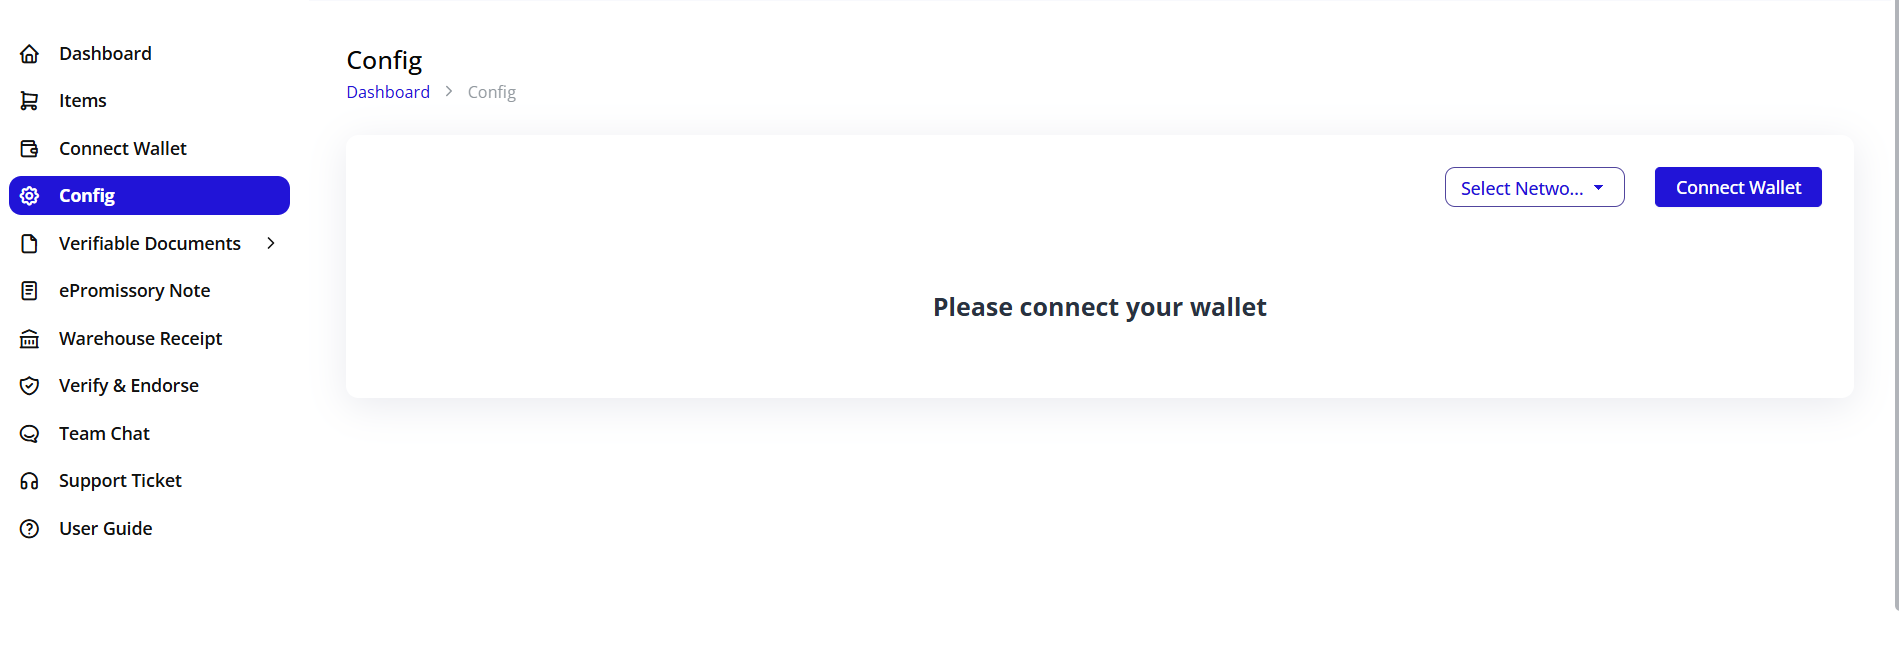
When you first access the Config page, you'll see:
- Network selector dropdown (top right): "Sepolia"
- Wallet Logout button (red, top right) - appears after connecting
- Create Token Registry button (blue, currently inactive)
Selecting Blockchain Network
Before connecting wallet, select your network:
- Click the network dropdown (shows "Sepolia" by default)
- Choose your blockchain network:
- Sepolia: Ethereum testnet for development and testing
- XDC: XDC Network for production
- Polygon: For lower transaction costs
- Ethereum Mainnet: For high-value production documents
Network Selection Guidelines:
| Network | When to Use | Gas Token | Cost |
|---|---|---|---|
| Sepolia | Testing, Development, Learning | SepoliaETH (free from faucet) | Free |
| XDC | Production, Real documents | XDC | Low |
| Polygon | High volume, Cost-sensitive | MATIC | Very Low |
| Ethereum | High-value, Maximum security | ETH | High |
Important: Once you create token registry on a network, all documents will be on that network. Choose carefully!
Connecting Your Wallet
Step 1: Ensure Wallet is Installed
You need a Web3 wallet browser extension:
- MetaMask (most popular)
- Coinbase Wallet
- Trust Wallet
- WalletConnect compatible wallets
If you don't have a wallet:
- Visit metamask.io
- Install browser extension
- Create new wallet
- Secure your recovery phrase
- Fund wallet with small amount of cryptocurrency
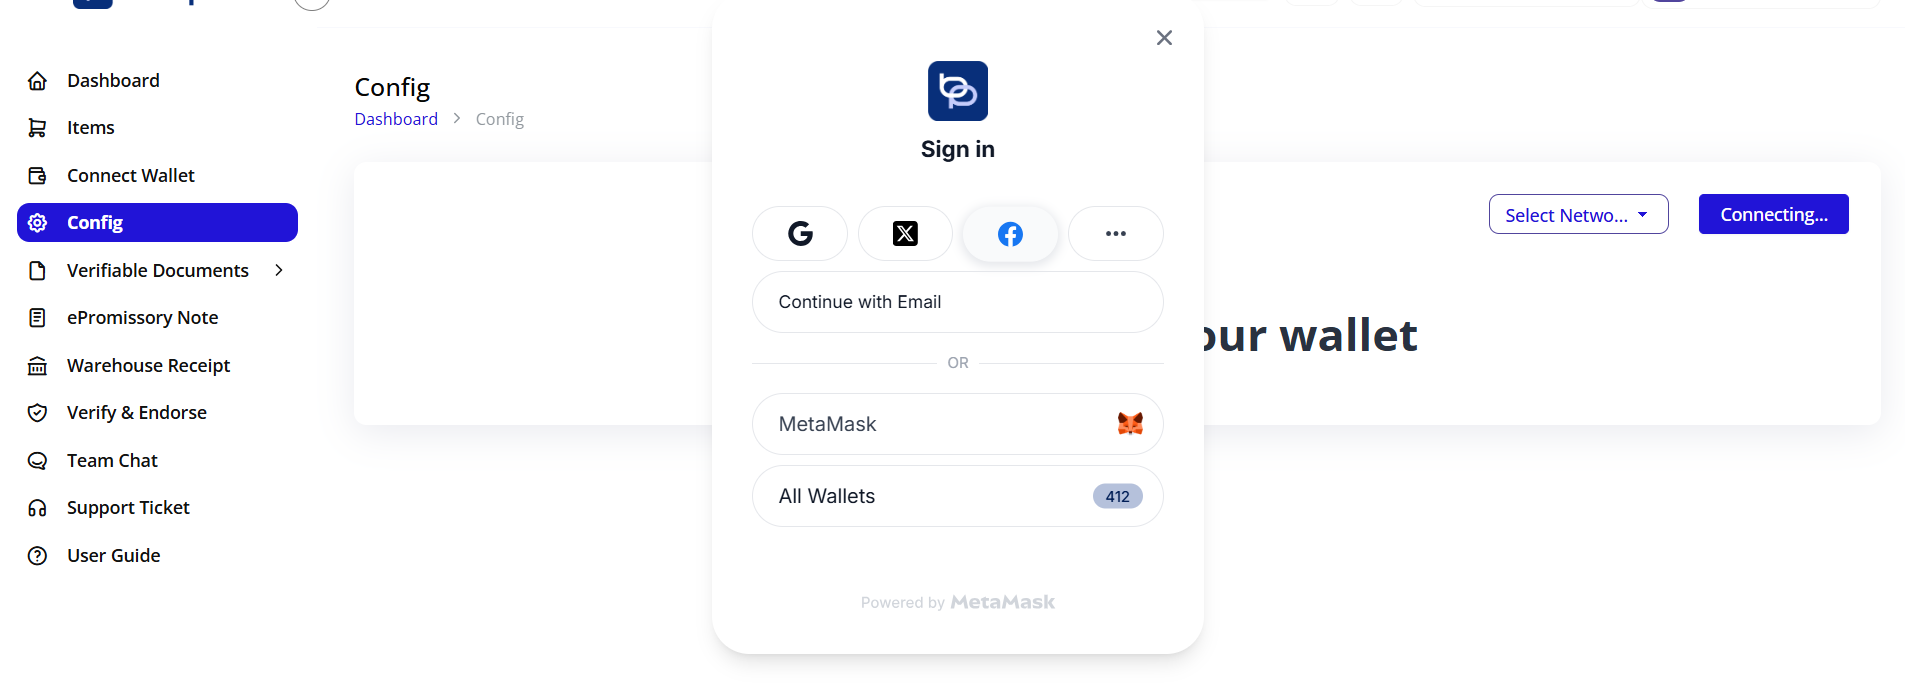
Step 2: Click Connect Wallet
- Click the Connect Wallet button (blue button in top area)
- Your wallet extension will pop up
- Select the account you want to use
- Review permissions requested
- Click Connect or Approve
Step 3: Confirm Connection
After connecting:
- Wallet address appears in top right
- Wallet Logout button becomes active (red)
- Create Token Registry button becomes active (blue)
- Network name shows your selected blockchain
Wallet Connection Status:
✅ Connected:
- Wallet address visible:
0x1234...5678 - Create Token Registry button enabled
- Can proceed to next step
❌ Not Connected:
- No address showing
- Buttons disabled
- Must connect before continuing
Wallet Requirements
Gas Fees: Your wallet must contain sufficient cryptocurrency to pay for blockchain transactions:
| Network | Required Token | Estimated Amount Needed |
|---|---|---|
| Sepolia | SepoliaETH | 0.1 SepoliaETH (free from faucet) |
| XDC | XDC | 100-200 XDC |
| Polygon | MATIC | 1-2 MATIC |
| Ethereum | ETH | 0.05-0.1 ETH |
Getting Test Tokens (Sepolia):
- Visit sepolia faucet: sepoliafaucet.com
- Enter your wallet address
- Receive free test ETH
- Wait 1-2 minutes for confirmation
Switching Networks
If you need to change blockchain network:
- Click network dropdown
- Select different network
- Wallet will prompt to switch networks
- Approve network switch in wallet
- Refresh page if needed
Note: Token registry is network-specific. You'll need separate token registries for each network.
Disconnecting Wallet
To disconnect your wallet:
- Click Wallet Logout button (red, top right)
- Wallet disconnects from application
- Configuration buttons become inactive
- Must reconnect to continue
Step 2: Create Token Registry
What is Token Registry?
A Token Registry is a smart contract deployed on the blockchain that:
- Acts as your document issuer identity
- Manages all documents you create
- Tracks document ownership
- Enables document transfers
- Provides verification proof
- Links to your DNS domain
Every organization needs exactly ONE token registry per blockchain network.
Creating Your Token Registry
Prerequisites:
- ✅ Wallet connected
- ✅ Sufficient gas tokens in wallet
- ✅ Correct network selected
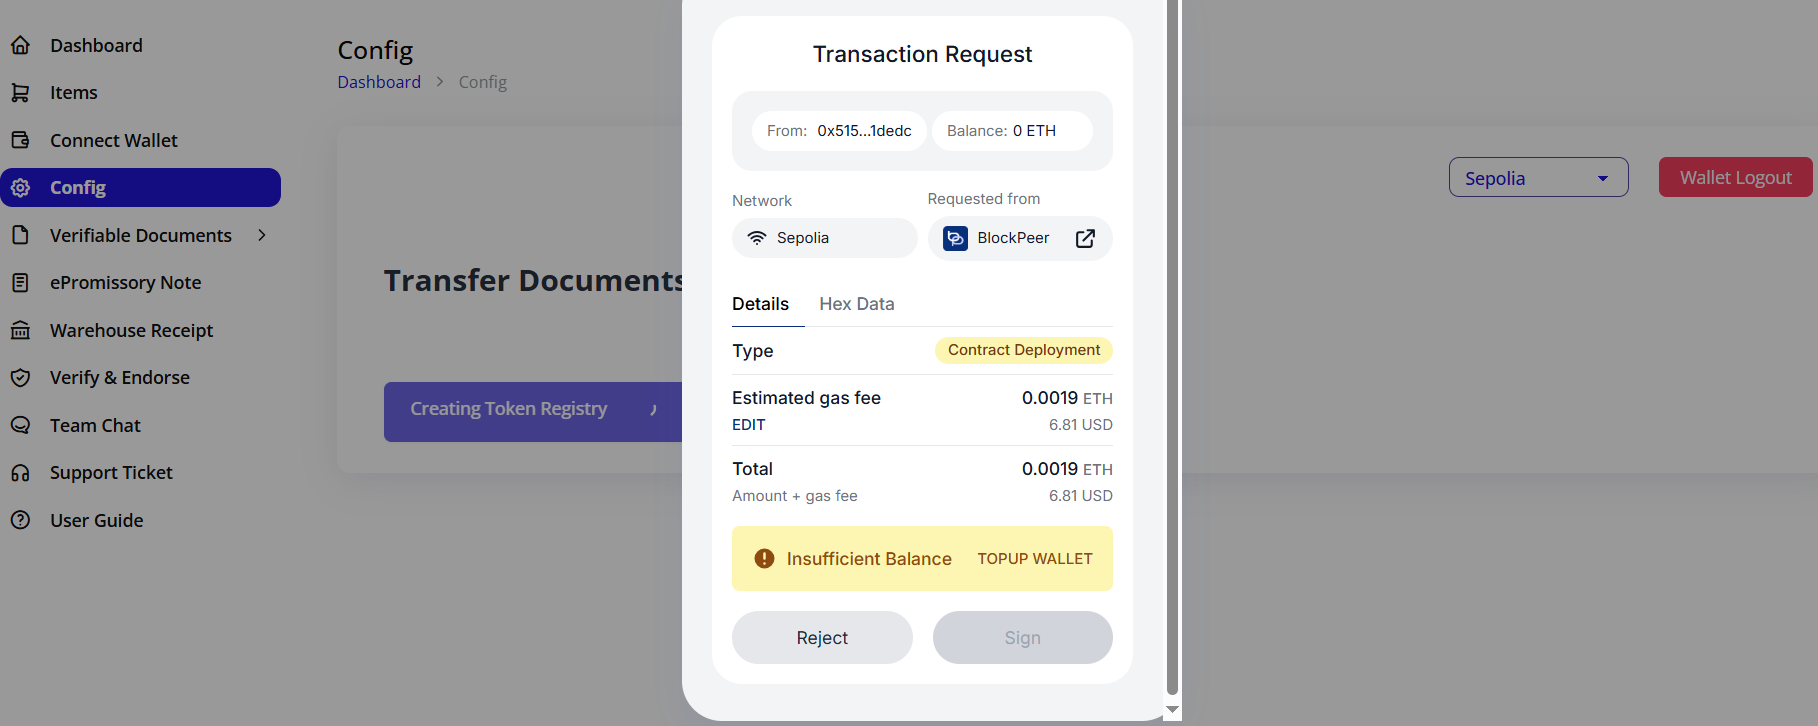
Step 1: Click Create Token Registry
- On the Config page, click Create Token Registry button (blue)
- Your wallet will pop up with transaction details
- Review the transaction:
- To: Contract factory address
- Gas Fee: Estimated cost
- Network: Confirm correct network
Step 2: Approve Transaction
- Review gas fee in wallet popup
- You can adjust gas fee:
- Slow: Lower cost, longer wait
- Average: Balanced
- Fast: Higher cost, quick confirmation
- Click Confirm or Approve in wallet
- Transaction is submitted to blockchain
Step 3: Wait for Confirmation
- Transaction is processing on blockchain
- Confirmation usually takes:
- Sepolia: 15-30 seconds
- XDC: 2-5 seconds
- Polygon: 2-5 seconds
- Ethereum: 15-60 seconds
- Do not close the page during confirmation
- A loading indicator may appear
Step 4: Registry Created
Once confirmed:
- Success message appears
- Token registry address is displayed
- Configuration page updates
- DNS configuration section appears
Understanding Your Token Registry

After creation, you'll see:
Document Store Section:
Shows your token registry details:
Document Store

Address: 0x0b35CDDF1DfDF6e830eE79bF8ba18AEf88183d29
This is the blockchain address of your document store.
What this means:
- Address: Your unique token registry identifier
- Permanent: This address never changes
- Network-Specific: Only valid on the network you created it
- Your Control: Only you can issue documents from this registry
Important Information:
- Copy and save this address
- You'll need it for DNS configuration
- This address identifies your organization on blockchain
- All your documents will be linked to this address
Token Registry Functions
Your token registry can:
Issue Documents:
- Create new eInvoices
- Issue ePromissory Notes
- Generate Warehouse Receipts
Manage Ownership:
- Transfer documents to others
- Accept transferred documents
- Track current owners
Verify Documents:
- Prove document authenticity
- Confirm issuer identity
- Validate document hasn't been tampered with
Revoke Documents:
- Mark documents as invalid
- Surrender documents
- Handle disputes
Step 3: Add DNS TXT Record
Why DNS Configuration is Required
DNS (Domain Name System) configuration:
- Links your business domain to token registry
- Proves your organization issued the documents
- Enables TradeTrust verification
- Establishes trust for document recipients
- Required for legal validity
Without DNS configuration, your documents cannot be verified on TradeTrust!
Understanding DNS TXT Records
A DNS TXT record is a type of DNS entry that contains text information. For TradeTrust, this record:
- Contains your token registry address
- Specifies the blockchain network
- Links domain to blockchain identity
- Enables public verification
Getting Your DNS Record
After creating token registry, you'll see:
DNS Configuration Section:
DNS Configuration ⓘ

Add this TXT record to your DNS config:

"\"openatts net=ethereum netId= 50 addr=
0x0b35CDDF1DfDF6e830eE79bF8ba18AEf88183d29\""

[Copy] button
DNS Record Components:
"\"openatts net=ethereum netId=50 addr=0x0b35...d29\""
Breaking this down:
openatts: TradeTrust identifiernet=ethereum: Blockchain typenetId=50: Network ID (50 = XDC, 11155111 = Sepolia, etc.)addr=0x0b35...d29: Your token registry address
Adding DNS Record to Your Domain
Step 1: Copy the DNS Record
- Click the Copy button
- Entire DNS record is copied to clipboard
- Keep this handy for next steps
Step 2: Access Your DNS Management
Go to your domain registrar or DNS provider:
- GoDaddy: DNS Management
- Namecheap: Advanced DNS
- Cloudflare: DNS settings
- Google Domains: DNS
- AWS Route53: Hosted zones
- Others: Look for "DNS Management" or "DNS Settings"
Step 3: Add New TXT Record
In your DNS management panel:
- Click Add Record or Add DNS Record
- Select record type: TXT
- Configure the record:
| Field | Value |
|---|---|
| Type | TXT |
| Host/Name | @ or leave blank (for root domain) OR use subdomain like "documents" |
| Value/Data | Paste the copied DNS record |
| TTL | 3600 (or default) |
Example Configuration:
Type: TXT
Host: @
Value: "\"openatts net=ethereum netId=50 addr=0x0b35CDDF1DfDF6e830eE79bF8ba18AEf88183d29\""
TTL: 3600
For Subdomain (Optional):
If you want to use a subdomain like documents.yourcompany.com:
Type: TXT
Host: documents
Value: "\"openatts net=ethereum netId=50 addr=0x0b35CDDF1DfDF6e830eE79bF8ba18AEf88183d29\""
TTL: 3600
Step 4: Save DNS Record
- Click Save or Add Record
- Confirm the addition
- Record is now in your DNS zone
DNS Propagation
What is DNS Propagation?
After adding the DNS record, it takes time to spread across the internet:
- DNS changes aren't instant
- Propagation time: 5 minutes to 48 hours
- Usually completes within 15-30 minutes
- Varies by DNS provider
During Propagation:
- Be patient and wait
- Don't make multiple changes
- Verification will fail until complete
- Check propagation status online
Check DNS Propagation:
- Visit dnschecker.org
- Enter your domain
- Select TXT record type
- Search to see propagation status globally
Common DNS Providers - Specific Instructions
GoDaddy:
- Log into GoDaddy account
- Go to My Products > Domains
- Click DNS next to your domain
- Scroll to Records section
- Click Add
- Type: TXT, Host: @, Value: (paste record)
- Save
Cloudflare:
- Log into Cloudflare
- Select your domain
- Click DNS tab
- Click Add record
- Type: TXT, Name: @, Content: (paste record)
- Proxy status: DNS only
- Save
Namecheap:
- Log into Namecheap
- Domain List > Manage
- Advanced DNS tab
- Add New Record
- Type: TXT Record, Host: @, Value: (paste record)
- Save
Troubleshooting DNS Addition
Q: Can't find DNS settings A: Contact your domain registrar's support. They can guide you to DNS management or add the record for you.
Q: Getting DNS syntax error A: Ensure you copied the entire record including quotes. Some providers may require you to remove outer quotes.
Q: Multiple TXT records on same host A: This is fine! You can have multiple TXT records. Just add this as an additional record.
Q: Using subdomain vs root domain A: Root domain (@) is recommended. If using subdomain, remember to use the full subdomain (like documents.yourcompany.com) when saving DNS in Blockpeer.
Step 4: Save and Verify DNS Record
Saving DNS Record in Blockpeer
After adding the TXT record to your domain's DNS:
Step 1: Enter Your Domain
In the Save DNS Record section:
- Find the input field: "Enter your domain"
- Type your domain name
- If root domain:
yourcompany.com - If subdomain:
documents.yourcompany.com
- If root domain:
- Do not include
http://orhttps:// - Do not include trailing slash
Examples:
- ✅ Correct:
blockpeer.com - ✅ Correct:
documents.blockpeer.com - ❌ Wrong:
https://blockpeer.com - ❌ Wrong:
www.blockpeer.com/
Step 2: Click Save
- Click the blue Save button
- Domain is linked to your token registry
- System saves the association
Step 3: Verify DNS
After saving, the Verify DNS section becomes active.
Verifying DNS Configuration
Why Verify?
Verification confirms:
- DNS record was added correctly
- Record has propagated
- Domain is properly linked
- Documents can be verified on TradeTrust
Verification Process:
- Locate Verify DNS Section:
   Verify DNS ⓘ

   Check your DNS record is added successfully or not.

   [Enter your domain like www.example.com]

   [Search] button
-
Enter Domain:
- Type the same domain you saved earlier
- Must match exactly
- Include subdomain if you used one
-
Click Search:
- System queries DNS servers
- Checks for TXT record
- Verifies record matches your token registry
- Validation takes 5-10 seconds
Verification Results:
✅ Success:
- "DNS record verified successfully" message
- Green checkmark or success indicator
- Configuration is complete!
❌ Failure:
- Error message appears
- Possible reasons:
- DNS not yet propagated (wait longer)
- TXT record not added correctly
- Wrong domain entered
- Typo in DNS record value
Multiple Domains:
You can add multiple domains:
- One token registry can link to multiple domains
- Each domain needs its own DNS TXT record
- Useful for different brands or subsidiaries
- All domains point to same token registry
Managing Domains:
- View all linked domains
- Remove domains if needed
- Update domain status
- Track verification dates
Verification Troubleshooting
Issue: "DNS record not found"
Solutions:
- Wait Longer: DNS propagation can take up to 48 hours
- Check Record: Verify TXT record is exactly as provided
- Check Domain: Ensure you entered correct domain
- Clear Cache: Your DNS provider may cache old records
How to Check:
# On Mac/Linux, open Terminal:
dig TXT yourcompany.com

# On Windows, open Command Prompt:
nslookup -type=TXT yourcompany.com
Look for the openatts TXT record in results.
Issue: "DNS record doesn't match"
Solutions:
- Verify Copy: Ensure you copied complete record
- Check Quotes: Some DNS providers handle quotes differently
- Re-add Record: Delete and re-add DNS TXT record
- Contact Support: If persistent, contact Blockpeer support
Issue: "Wrong network ID"
Solutions:
- Verify Network: Ensure network in DNS matches your token registry network
- Recreate Registry: You may have created registry on wrong network
- Update DNS: Change netId in DNS record to match
DNS Best Practices
Domain Selection:
- Use your company's primary domain
- Subdomain acceptable if needed
- Must be a domain you control
- Should be professional and trustworthy
Security:
- Keep DNS control secure
- Use two-factor authentication on DNS provider
- Regularly audit DNS records
- Monitor for unauthorized changes
Maintenance:
- Document your DNS configuration
- Set calendar reminder to review annually
- Update if you change DNS providers
- Maintain backup of DNS settings
Configuration Checklist
Use this checklist to ensure complete configuration:
Pre-Configuration
- Domain name available and accessible
- DNS management access confirmed
- Wallet software installed (MetaMask, etc.)
- Blockchain network selected
- Test tokens acquired (if using testnet)
- Sufficient gas tokens in wallet
Configuration Steps
- Logged into Blockpeer eTrade
- Navigated to Config page
- Network selected from dropdown
- Wallet connected successfully
- Wallet address showing correctly
- Create Token Registry button clicked
- Transaction approved in wallet
- Token registry creation confirmed
- Token registry address displayed
- DNS TXT record copied
- DNS TXT record added to domain
- Domain entered in Save DNS Record
- Save button clicked
- Waited for DNS propagation (15-30 min)
- Domain entered in Verify DNS
- Search button clicked
- DNS verification successful
- Domain appears in Domain Records Added
Post-Configuration
- Configuration tested with sample document
- Document verified on TradeTrust.io
- Wallet backed up securely
- Seed phrase stored offline
- Token registry address documented
- DNS record backed up
- Team members trained
- Support contacts saved
- Ready to create production documents
Summary
Configuration is the foundation of your eTrade system. Completing these steps:
- ✅ Establishes your blockchain identity via token registry
- ✅ Links your business domain to blockchain address
- ✅ Enables TradeTrust verification for global acceptance
- ✅ Allows document creation across all document types
- ✅ Provides legal validity through DNS verification
Key Points to Remember:
- Configuration is one-time setup - Complete once per network
- Wallet security is critical - Protect seed phrase at all costs
- DNS propagation takes time - Be patient, usually 15-30 minutes
- Test on Sepolia first - Learn with free test tokens
- Backup everything - Token registry address, DNS record, wallet
- Each network is separate - Different token registry for each blockchain
After Configuration:
You're ready to:
- Create eInvoices with crypto payment options
- Issue ePromissory Notes for trade credit
- Generate Warehouse Receipts for commodities
- Verify documents from trading partners
- Transfer and endorse electronic documents
- Participate in global digital trade
Configuration represents your commitment to digital trade transformation!
Next Steps:
- Read the E-Invoice guide to create your first electronic invoice
- Explore ePromissory Note for trade credit instruments
- Learn Warehouse Receipt for commodity documents
- Master Verify & Endorse for document verification