Standard eBL
The Standard electronic Bill of Lading is the most common format used for ocean transport and multimodal transport.
1. Overview
The Standard eBL format includes:
- Complete shipper and consignee information
- Detailed cargo description
- Port of loading and discharge
- Freight and charges information
- Carrier receipt and terms & conditions
- Digital signatures
2. View Standard eBLs
Access Standard eBL List
- Click on Standard eBL from the left sidebar
- You'll see a list of all your Standard format eBLs
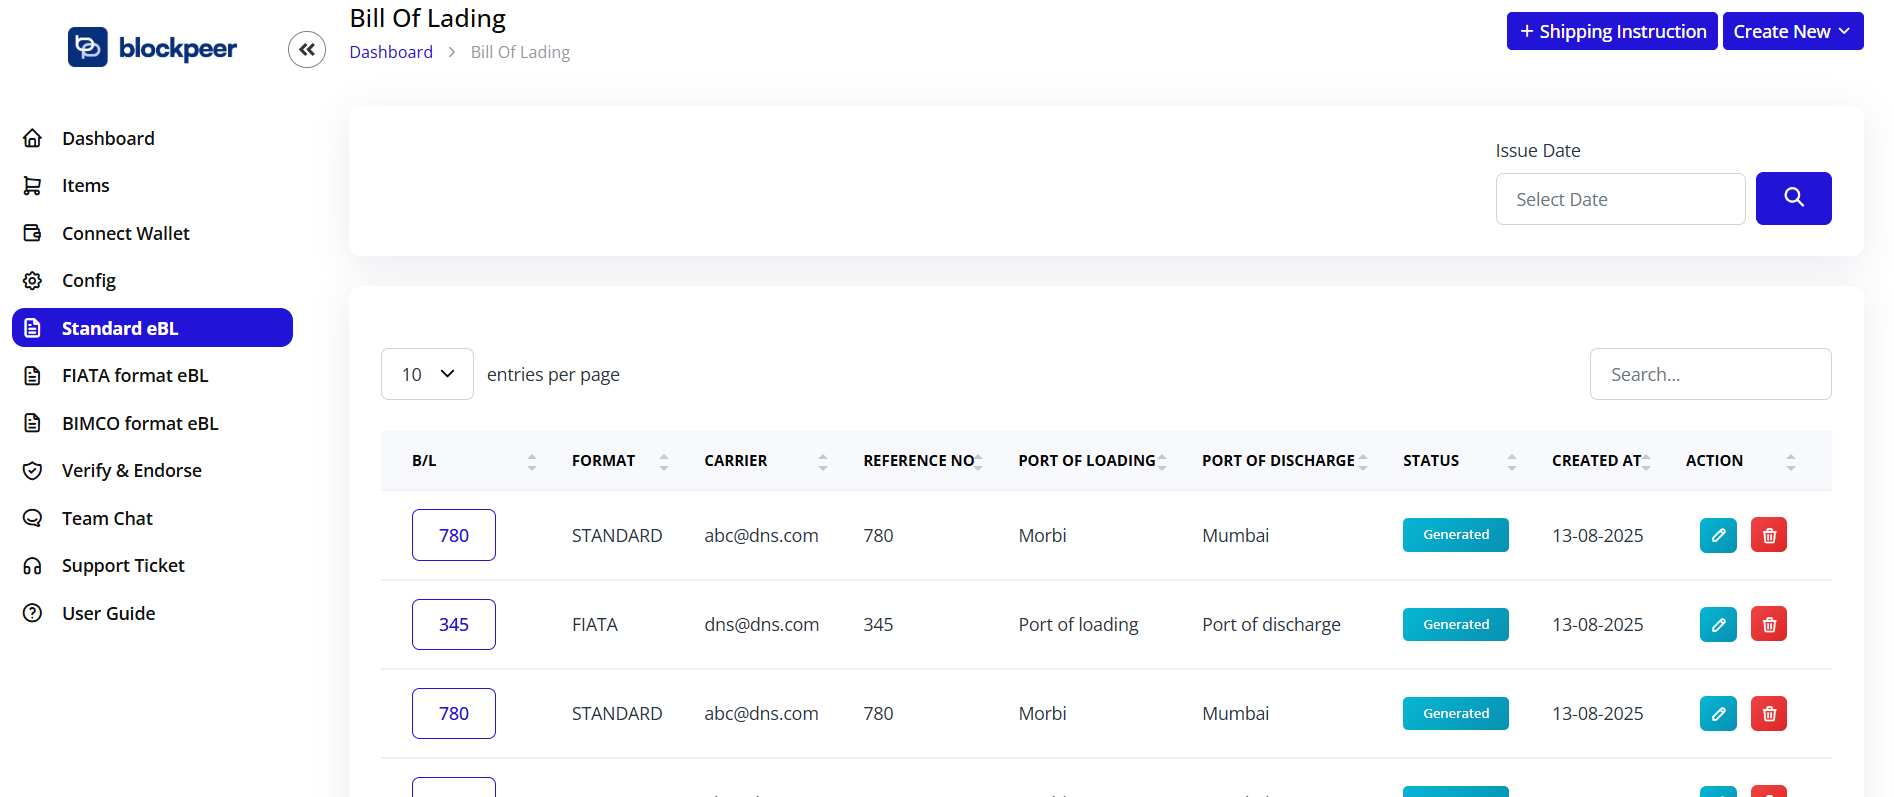
List View Information
The list displays:
- B/L: Bill of Lading reference number
- FORMAT: STANDARD
- CARRIER: Carrier email address
- REFERENCE NO: Reference number (matches B/L number)
- PORT OF LOADING: Origin port
- PORT OF DISCHARGE: Destination port
- STATUS: Document status (Generated, In Transit, Delivered)
- CREATED AT: Date of creation
- ACTION: Edit and delete buttons
Filter and Search
- Issue Date: Filter by date using the date picker
- Search: Search by B/L number, carrier, or port names
- Entries per page: Adjust the number of rows displayed (10, 25, 50, 100)
3. Create Standard eBL
Step 1: Access Creation Form
- Click on Standard eBL from the sidebar
- Click the + Create New button (top right)
- You'll be taken to the "Create Bill Of Lading" form

Step 2: Fill Basic Information
SCAC Code
- Enter the Standard Carrier Alpha Code
- 2-4 letter code identifying the carrier
B/L Number
- Enter your Bill of Lading number
- Must be unique for your organization
Booking Number
- Enter the booking reference number
Export References
- Enter any export reference numbers or documentation
Step 3: Carrier and Party Information
Carrier
- Select DNS from dropdown
- Choose the carrier from your configured list
Beneficiary
- Enter beneficiary wallet address
- Or check "same as beneficiary" to use holder address
Holder
- Enter holder wallet address
Shipper Information
- Shipper name: Company or individual name
- Shipper street: Street address
- Shipper country: Country of origin
Consignee Information
- Select "to order", "to order of", or "to order of bearer"
- Enter consignee name (if applicable)
Step 4: TO THE ORDER OF
Fill in the consignee details based on your selection in Step 3.
Step 5: Vessel and Voyage Information
Vessel
- Enter vessel name
- Use clause 1 + 19 format if needed
Voyage Number
- Enter the voyage number
Place of Receipt
- Enter place of receipt (if multimodal transport)
Place of Delivery
- Enter place of delivery (if multimodal transport)
Step 6: Port Information
Port of Loading
- Enter the port where goods are loaded
Port of Discharge
- Enter the destination port
Step 7: Notify Party Information
Notify Party (Clause 22)
- Enter the party to be notified upon arrival
Party
- Enter party name (if different from consignee)
Step 8: Cargo Details
Particulars Furnished by Shipper
Add cargo details in the table:
- DESCRIPTION: Description of goods, marks and numbers, container/serial numbers
- GROSS WEIGHT: Total weight of the cargo
- MEASUREMENT: Volume or cubic measurement
- ACTION: Click + to add more rows
💡 Note: "Above particulars as declared by Shipper, but without responsibility of our representation by Carrier (see clause 14)"
Step 9: Freight & Charges
Fill in the freight and charges table:
- Freight & Charges: Type of charge
- Rule: Applicable rule or tariff
- Unit: Unit of measurement
- Currency: Currency code (USD, EUR, etc.)
- Prepaid: Amount paid in advance
- Collect: Amount to be collected at destination
Step 10: Carrier Receipt and Terms
Carrier's Receipt (Clause 1 and 14)
- Enter total number of containers or packages received by carrier
Place of Issue of B/L
- Enter the location where B/L is issued
Terms & Conditions
- Enter or paste your terms and conditions
- Maximum 500 characters
- Character counter displayed at bottom right
Step 11: Additional Information
Number & Sequence of Original B/L
- Enter the number of original Bills of Lading issued
Date of Issue of B/L
- Select the issue date using the date picker
- Format: dd-mm-yyyy
Shipped on Board Date (Local Time)
- Select the date when goods were loaded
- Format: dd-mm-yyyy
Declared Value (Clause 7.3)
- Enter declared value if applicable
Step 12: Signatures
Signed for the Carrier carrier
- Click Sign here button
- Sign using your connected wallet
- Digital signature will be recorded on blockchain
As Agent(s) for the Carrier
- Click Generate eBill Of Lading button if needed
Step 13: Company Stamp (Optional)
- Upload your company stamp image
- Accepted formats: JPG, PNG, GIF
- Displayed on the generated eBL
Step 14: Generate eBL
- Review all information entered
- Click Preview to see how the eBL will look (optional)
- Click Generate eBill Of Lading button
- Confirm the transaction in your wallet
- Wait for blockchain confirmation
- Your Standard eBL will be created and added to the list

4. Edit Standard eBL
Edit an Existing eBL
- From the Standard eBL list, click the Edit button (pencil icon)
- Make your changes in the form
- Click Update to save changes
- Confirm the transaction in your wallet
⚠️ Note: Editing an eBL creates a new version on the blockchain while maintaining the audit trail.
5. Delete Standard eBL
Delete an eBL
- From the Standard eBL list, click the Delete button (trash icon)
- Confirm the deletion in the popup dialog
- The eBL will be removed from your list
⚠️ Warning: Deletion is permanent and cannot be undone. The blockchain record remains for audit purposes, but the eBL will no longer be accessible in your dashboard.
6. Download and Share
Download eBL
- Click on the B/L number to view details
- Click Download button
- Choose format:
- .tt: TradeTrust format for verification
Share eBL
- Click Share button
- Copy the verification link
- Share with counterparties for verification
✅ Next: Learn how to create FIATA format eBL or BIMCO format eBL.